Live Chat Software by Kayako |
|
Banners plugin guide
Posted by , Last modified by on 13 August 2014 03:57 AM
|
|
|
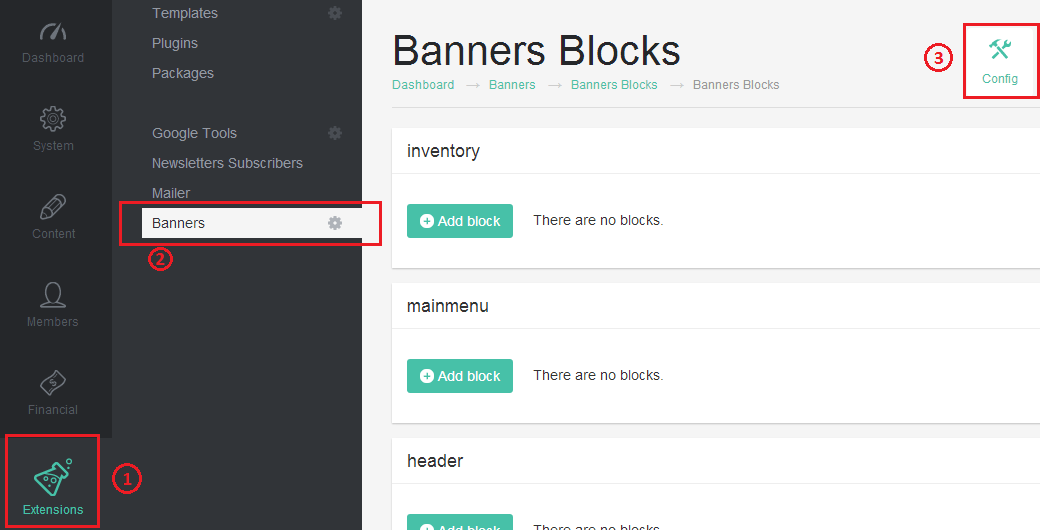
Greetings, 1) Banners plugin installation: a) log into your Subrion Admin Panel b) go to Extensions -> Plugins -> Available Plugins tab -> change the Mode (at top right) from 'Local' to 'Remote' c) choose the Banners plugin and click on 'Install' button (download icon at right). 2) Banners Plugin configuration: a) go to Extensions -> Banners b) click on 'Config' button (at op right)
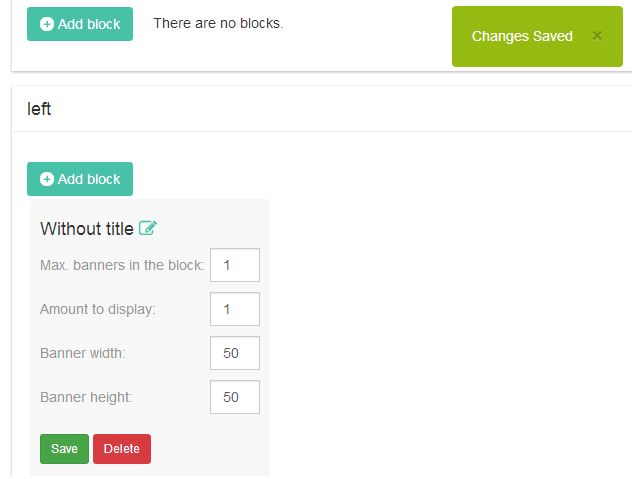
c) click on 'Add Block' button near the needed position (position where you want to have the banner block) d) set up all the config's values and push the 'Save' button. Once it's done you will see the message with the green flag: "Changes Saved."
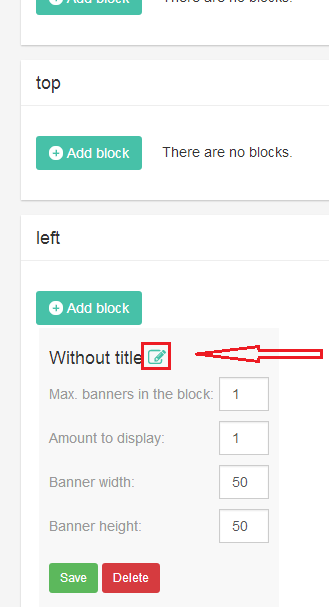
e) click on Edit (pencil) icon near the 'Without title' phrase
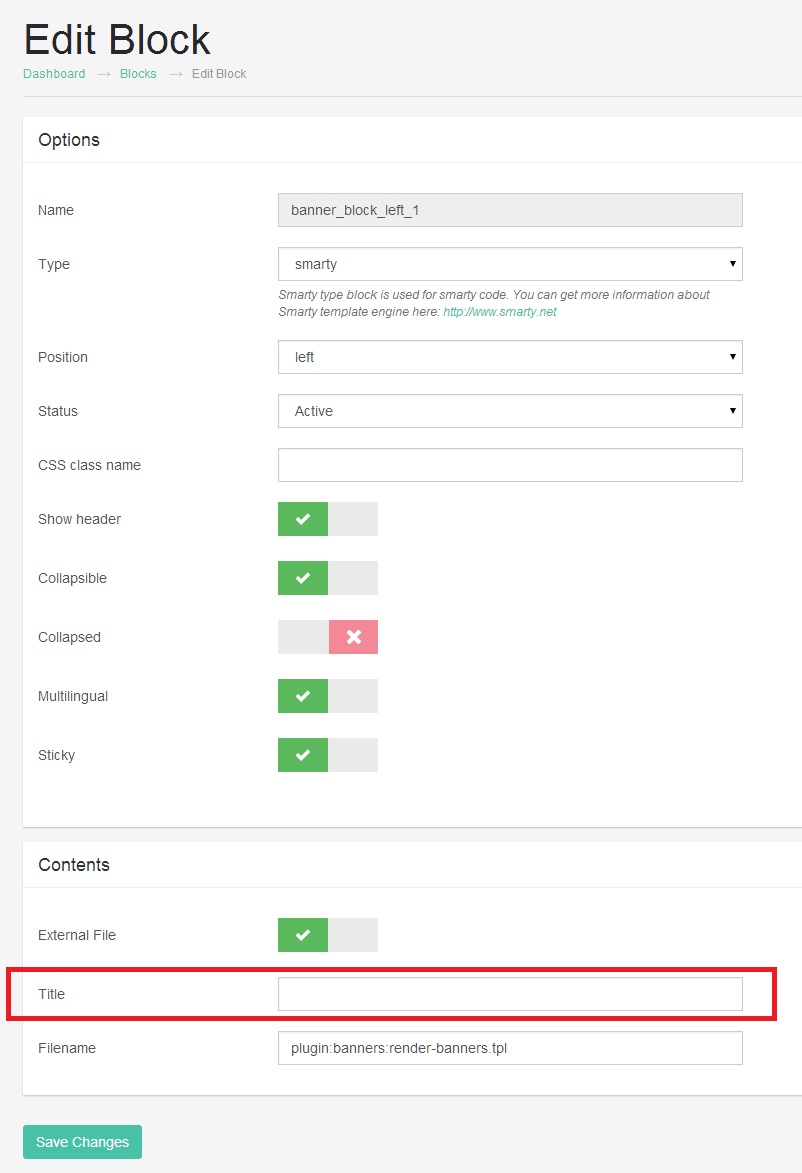
f) fill the value of 'Title' field and click on 'Save Changes' button.
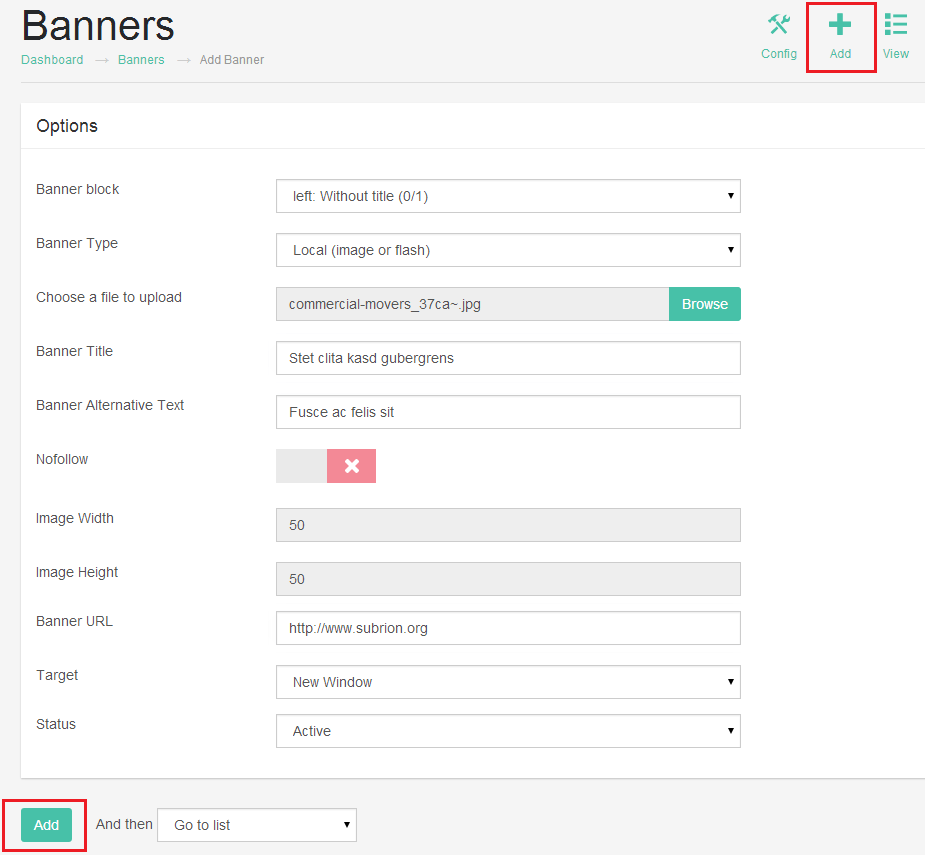
3) Banner adding process: a) go to Extensions -> Banners b) click on 'Add' button (at top right) c) choose the needed banner block (which you created on the step#2) for 'Banner block' value d) fill all the needed values and click on 'Add' button
e) Once it's done you will see the message with the green flag: "Banner added."
Here you are.
Note. By default the block with banner will be shown on every page of your site based on the Subrion CMS.
Thanks for your interest in the Subrion CMS! | |
|
|

